History
All generated images and videos are automatically saved to history.
Viewing History
History is located at the bottom of the home page, showing all generated results.
Filter Function
You can filter records by generation mode:
- All
- Generate
- Sticker
- Edit
- Story
- Diagram
- Video
- Slides
Record Contents
Each record contains:
| Item | Description |
|---|---|
| Thumbnail | Preview of generated result |
| Audio Indicator | Speaker icon on top-right of thumbnail, indicating narration audio is available |
| Prompt | The prompt used |
| Mode Tag | Generation mode |
| Time | Relative time (e.g., "5 minutes ago") |
| File Size | Storage space used by this record |
Actions
Load Record
Click a record to load its settings:
- Click the history record item
- Confirm loading (will overwrite current input and settings)
- Prompt and all options will be restored
Preview Images/Videos
Click the thumbnail to open Lightbox preview:
- Image mode: Navigate left/right through multiple images
- Video mode: Play the video
- Slides mode: If narration audio exists, an audio player appears at the bottom; the download menu offers audio download and MP4 video export
Loading Slides Records
When loading slides from history, the system automatically restores all page images and narration audio from OPFS. After restore, you can edit pages inline and selectively regenerate only the modified pages.
Delete
Click the delete button to delete a single record.
Note
Deletion cannot be undone.
Clear All
Click "Clear All" to delete all history records.
Storage Space
History is stored in the browser:
| Data Type | Storage Location |
|---|---|
| Record Info | IndexedDB |
| Images/Videos | OPFS |
| Narration Audio | OPFS |
Storage usage is displayed at the top of the page.
Space Limits
OPFS space limits depend on:
- Browser type
- Available device space
- Usually at least several GB
Export and Import
Click the transfer icon (⇄) in the top right of the history area to open the export/import panel.

Export History
- Select records to export
- Click "Export"
- Download JSON file
Import History
- Click "Import" or drag and drop JSON file
- Select records to import
- Records will be added to history
Cross-Device Transfer
Supports transferring history records and characters between two devices via P2P connection:
- Select records to transfer on the sending device
- Click "Cross-Device Sync"
- Enter the connection code on the receiving device
- Confirm both devices show the same verification icons
- Click "Confirm & Start Transfer" to begin
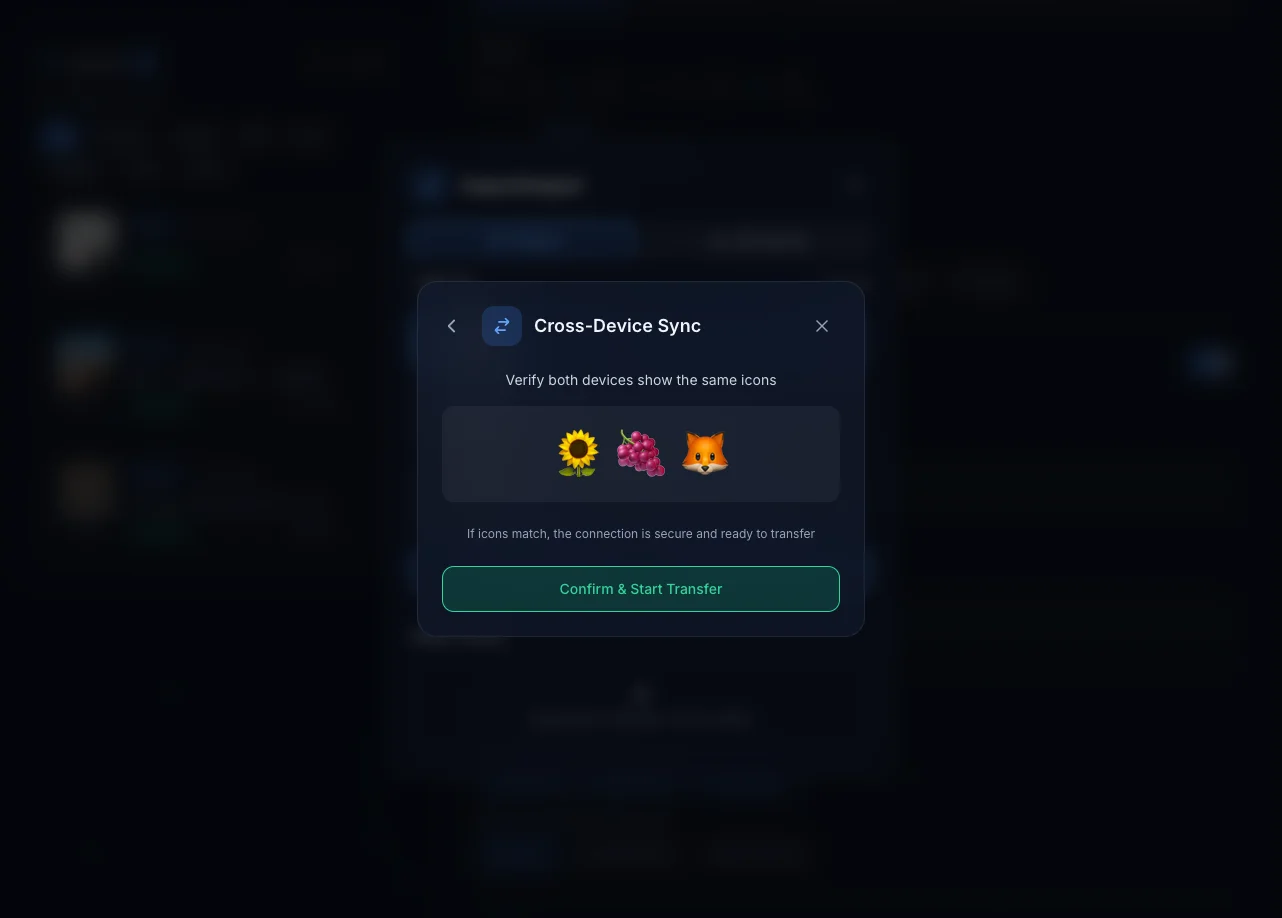
Tip
P2P transfer uses end-to-end encryption. Data does not pass through any server. Seeing the same emoji icons on both devices confirms a secure connection.
About TURN Server
P2P connections use WebRTC technology. In certain network environments (such as strict NAT or firewalls), a TURN server may be needed to relay the connection. The system uses Google STUN servers by default. You can also configure Cloudflare TURN credentials in settings for more stable connectivity.
Next Steps
- Smart Search - Quickly search through history
- Character Library - Create characters from history
- Image Editing - Edit images from history
- Slide Conversion - Convert images from history to PPTX