Story Mode
Story mode lets you create multi-step visual narratives while maintaining character and style consistency.
Example: Three Dogs' West Coast Road Trip
Here's how to generate a 4-step story about three dogs exploring national parks in the American West:
Step 1: Select Mode and Set Steps
- Select "Story" mode
- Choose "4 steps" for the step count
Step 2: Write Your Story Prompt
Describe the characters and story flow in your Prompt:
Characters: Three best friends — an orange Shiba Inu, a gray-white Husky, and a black-white Border Collie
Style: Pixar 3D animation style, warm and bright colors
Story flow:
1. The three dogs excitedly walk out of the airplane, with the iconic LAX architecture in the background
2. They stand before dry desert rocks, with Joshua Tree National Park's unique vegetation behind them
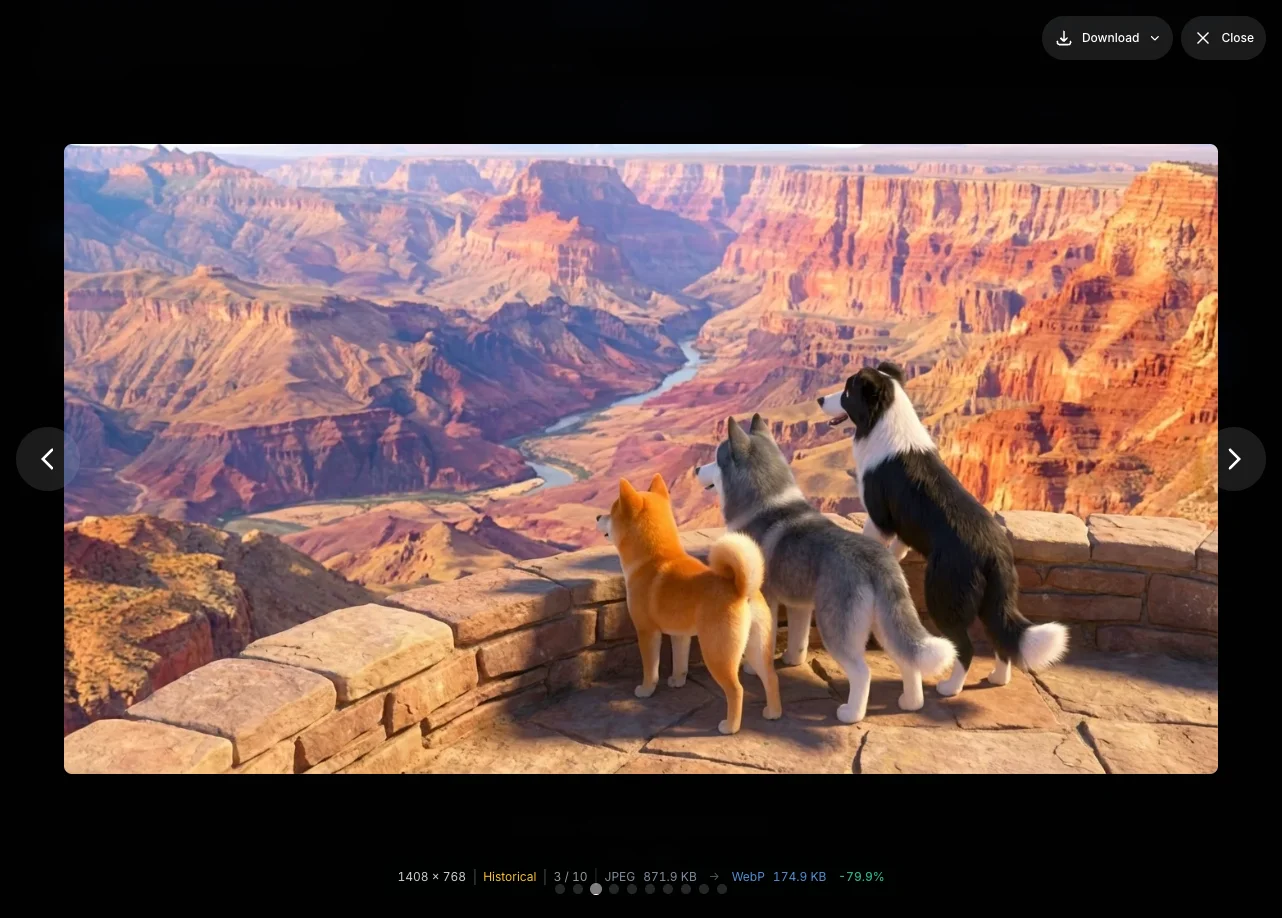
3. They stand at a Grand Canyon overlook, the majestic canyon landscape stretching behind them
4. At sunset, the three dogs sit on a beach, watching the Pacific Ocean sunset, ending their wonderful journeyTip
Write the character description and story flow in the same Prompt. The system will automatically match each step to the corresponding scene.
Step 3: Generate the Story
Click the "Generate" button, and the system will sequentially generate story images.
About Generation Count
The image model may decide to generate multiple images per step, resulting in more images than your specified step count. For example, setting 4 steps might produce 8-10 similar images. This is a current model limitation. We recommend selecting the images that best fit your needs after generation.
Advanced Usage
Using Reference Images
For better character consistency, you can upload reference images:
- Upload character images in the reference images area
- The system will reference this image at every step
- It also references the previous step's result to ensure visual continuity
Prompt Structure Tips
A good story Prompt typically includes:
Characters: (detailed appearance description)
Style: (art style, color tone)

Story flow:
1. (Scene description for step 1)
2. (Scene description for step 2)
3. (Scene description for step 3)
4. (Scene description for step 4)
Using Character Library
If you've already created characters in the Character Library, you can use them directly:
- Select a character from "My Characters"
- The character will be automatically added as a reference image
- AI will generate consistent appearances based on the character settings
See Character Library for details.
Generation Flow
Story mode uses sequential generation, where each step references:
- Your uploaded original reference images (character consistency)
- The previous step's generated result (visual continuity)
This ensures stable character appearances while maintaining natural scene transitions.
Story Options Explained
Quality
Set the output image resolution: 1K, 2K, or 4K.
Steps
Choose between 2-8 steps. Note: The actual number of generated images may vary based on AI interpretation.
Sequence Type
Specify the narrative type for your story:
- Unspecified: Let AI decide automatically
- Story: Traditional narrative structure
- Process: Step-by-step instructions
- Tutorial: Educational content
- Timeline: Chronological progression
Visual Consistency
Control the visual style across steps:
- Unspecified: Let AI decide automatically
- Consistent: Maintain uniform style
- Evolving: Allow gradual style changes
Transition Effect
Set the transition style between steps:
- Unspecified: Let AI decide automatically
- Smooth: Natural transitions
- Dramatic: Strong contrasting changes
- Fade: Soft fade in/out
Output Format
Specify how images are presented:
- Unspecified: Let AI decide automatically
- Storyboard: Comic panel-like layout
- Individual: One separate image per step
Export Options
Completed stories can be:
- Downloaded as ZIP (all images)
- Generated as PDF
Next Steps
- Character Library - Create reusable characters
- Image Editing - Fine-tune individual scenes